Making of Eternity
-Intro-
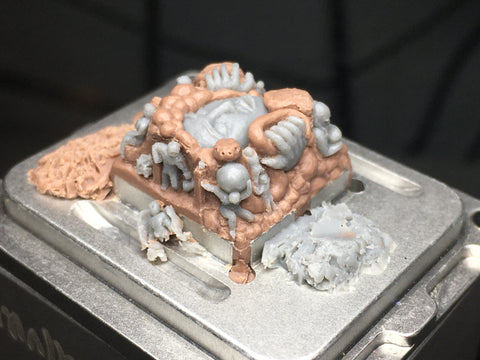
This page documents the sculpting process from beginning to end for my sculpture "Eternity". With my previous Sculpture "Pain" I explained that I used both Hard and Medium Monster Clay. Using the Hard Clay for the more structural parts that required some strength and using medium for protrusions that needed to stick to the hard base. For Eternity to show where I would use each kind I swapped the medium Monster Clay out for their medium gray variation. Also it looks pretty cool.
-Some Thoughts On Gray Monster Clay-
You could really use whichever variant you prefer, but in my experience at this scale the gray variant seems slightly more transparent compared to the classic brown and it also seems slightly glossier, so gauging the surface texture can be a bit tricky. At this scale it may be better suited for more complex or rough textures instead of using them for something smooth like the humans in the sculpture as unevenness on the surface can be hard to see. The resistance the gray variant has from to sticking to things is nice though as it does feel somewhat cleaner to use compared to the original brown. I'm still not entirely sure how to feel about the gray variants for smaller sculptures like keycaps or miniatures as I need more practice with it but I find it to be really nice for larger sculpting projects.
-Sculpting Process-
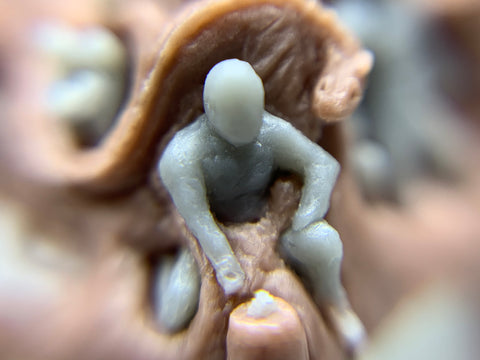
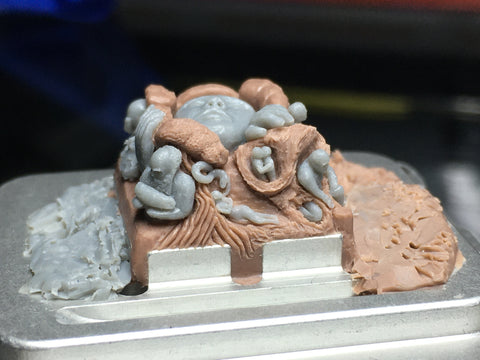
For the Eternity and Pain my approach with sculpting was a bit different from my older projects. With previous sculptures I would plan ahead what I was going to make or rather sit around and wait for an idea to come to me and then start on that idea. However for Eternity and Pain I didn't really have any idea in particular when I started. They both started out as a standard cherry blank, I would then just start removing clay at random and seeing if it looks interesting, if not then I'd add, remove, or deform it until there was a shape that looked cool. I would look at it more like I was excavating a dinosaur fossil than sculpting. Where I would try to feel out what was fossil and what was rock.Since it's all the same color you kind of have to feel it out emotionally instead of going off of what you see. Eventually you start to project some emotion, memory, or idea onto a section as it starts to resemble something, form there you can mostly just sculpt that particular thing as you usually would. I've found with this way of looking at the sculpting process I can get some placement and intermingling of ideas that I normally wouldn't come up with. I think it's a lot more mentally and emotionally taxing but can lead to sculptures that you're more happy with and interested in.
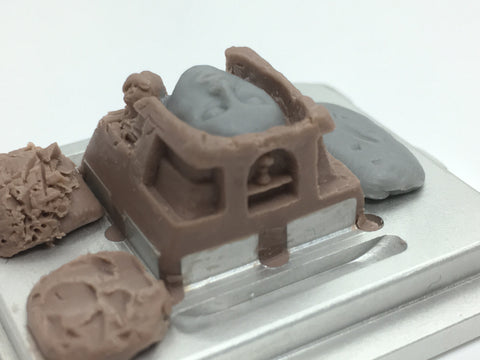
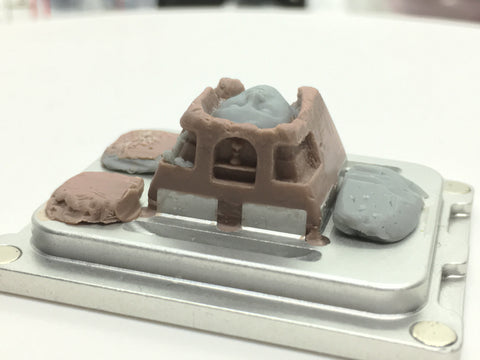
One other minor thing I do is to place a blob of each kind of clay on the sculpting base to quickly grab from when adding new sections, as well as a "junk blob" on the front right to put clay that I've removed from the sculpt and to clean my tools. This is helpful for keeping your sculpt clean and free of hair or other small particulates that may land on it.
-Tools-
Clay used was Monster Clay Hard, and Monster Clay Gray Medium
*Again you could use any variants of Monster Clay you want, or really any sculpting medium for that matter I just prefer these.
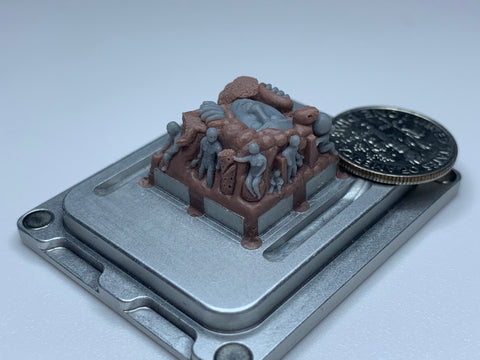
Sculpting Base is a :~$ynth 1u 3.0 By Hunger Work Studio , Joey Quin and Salvun
*There are cheaper and more available sculpting bases you could use but the magnetic mold box is really nice for protecting your sculpt while you aren't working on it. However if you're using steel tools watch out for the magnets on the corners as they can grab your tools and damage your work.
Most of the sculpting tools I used for these last two sculptures were custom made. They way I do it is to wait until I encounter a problem area like sculpting something around a corner. What I'll then do is take a sewing pin, stick it into a wooden dowel and then sand and bend it into the shape I need. You can also modify existing tools from a generic sculpting kit. The reason to do this is mainly because it's very difficult to find tools for sculpting at this scale and you can make your own pretty quickly and without much expense, just a file, sewing pins, and some wooden dowels.

All of these tools pictured were made by hand from scratch or were modified tools from generic sculpting kits.
-Progress Photos-
June 5th 2020


June 6th 2020


June 7th 2020


June 13th 2020

June 15th 2020


June 26th 2020


July 11th 2020

July 27th 2020


August 15th 2020


August 16th 2020


August 29th 2020


August 30th 2020


September 4th 2020


September 5th 2020


September 8th 2020


September 22nd 2020


September 23rd 2020


September 26th 2020


September 28th 2020


September 29th 2020


October 1st 2020


October 2nd 2020

October 13th 2020

October 15th 2020

October 26th 2020


November 6th 2020


December 11th 2020


December 12th 2020


December 19th 2020


December 24th 2020


December 26th 2020


December 28th 2020

January 4th 2021


January 2nd 2021


January 4th 2020


January 5th 2021


January 6th 2020


January 12th 2021


January 13th 2021


January 15th 2021

January 16th 2021


January 17th 2021


January 25th 2021